
International Dark Sky Week
International Dark Sky Week is a worldwide annual celebration, organised by DarkSky International that raises awareness about the impact of light pollution and celebrates the beauty and importance of natural night skies. Along the South West Coast Path, we’re fortunate to enjoy some of the darkest skies in the UK, with the trail passing through Exmoor National Park and close to Bodmin Moor, both designated International Dark Sky Reserves. These protected areas offer exceptional stargazing opportunities and play a vital role in preserving our night skies for future generations. Exmoor, home to one of the UK’s first Dark Sky Reserves even holds an annual Exmoor Dark Skies Festival each autumn to celebrate and explore the cosmos. In celebration of Dark Sky Week, we invite you to look up, as two local professional photographers share their favourite stargazing spots and expert tips to help you capture the night sky including the Milky Way and, on rare occasions, even the Northern Lights (aurora borealis).
Photographing the Milky Way – Jen Rogers
I have been a landscape and seascape photographer for more than 30 years, but developed a passion for photographing the night sky after seeing a talk on astrophotography in 2018. I have a love of wild places and spend my spare time walking the coast path or swimming and kayaking along the coastline. This has allowed me to find numerous remote and dark locations to photograph the night sky. It is a wonderful experience to stand out under the stars on a clear night.
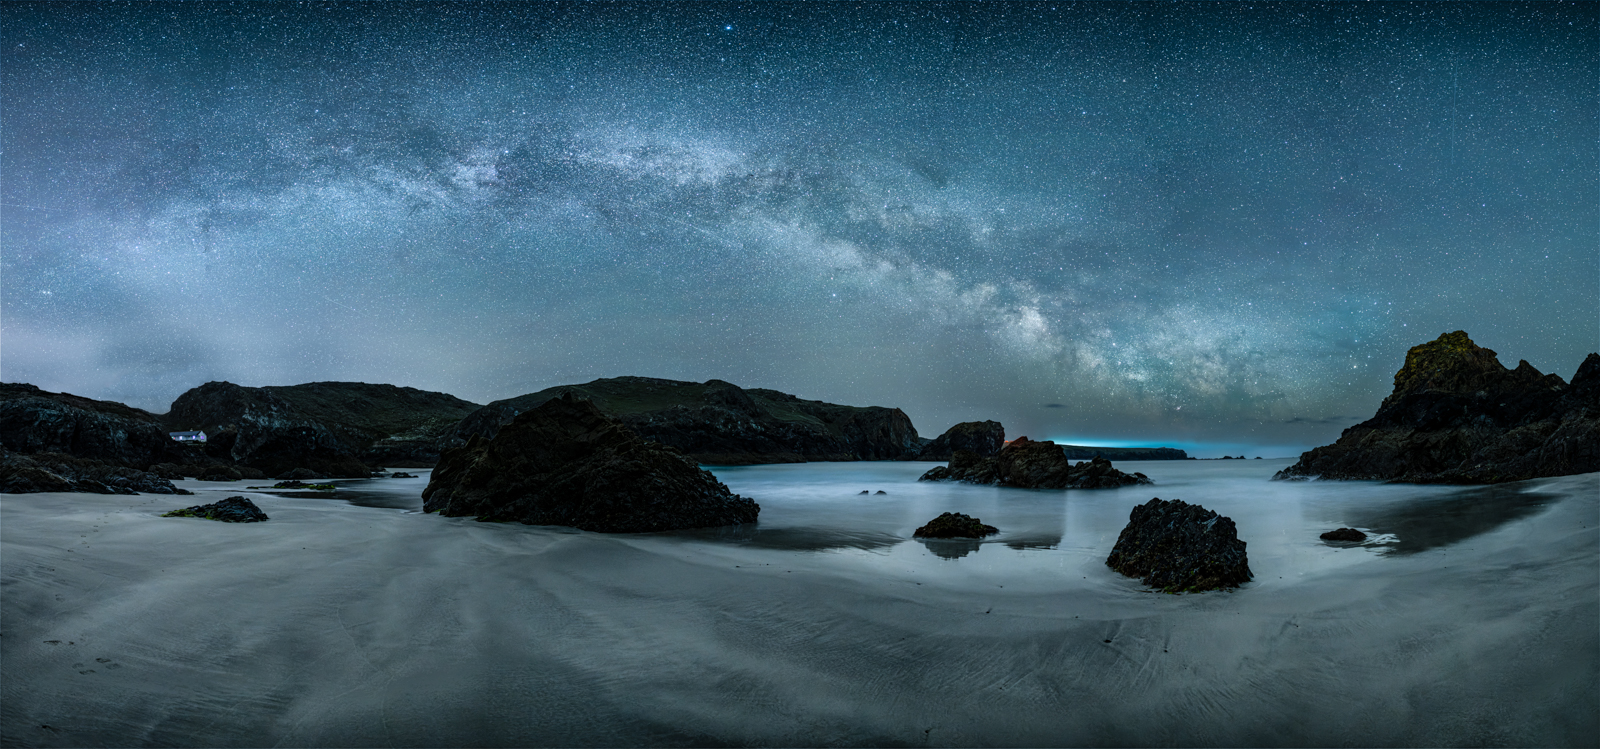
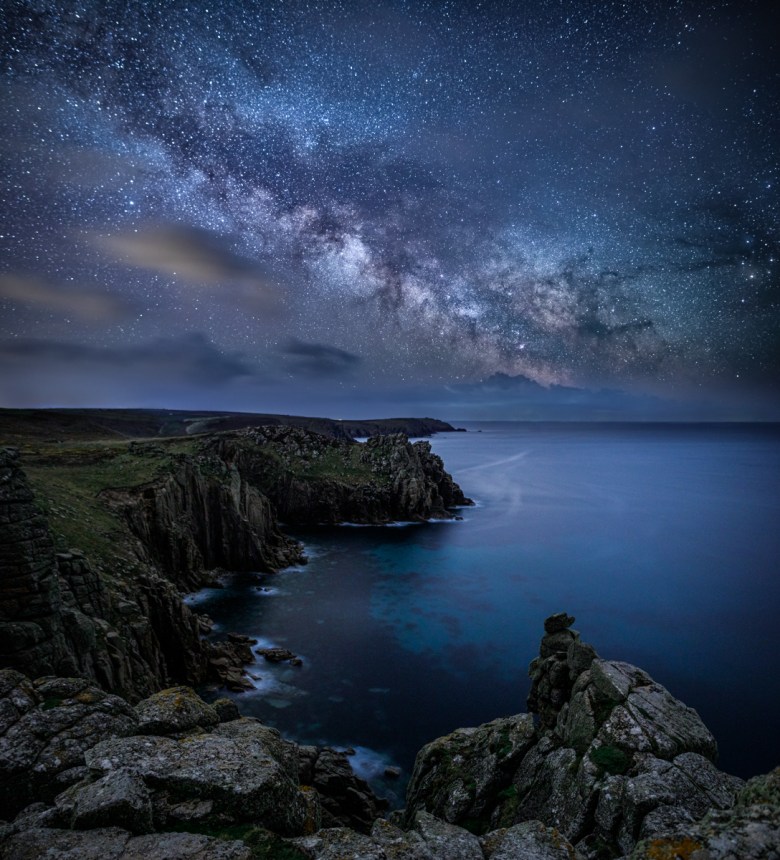
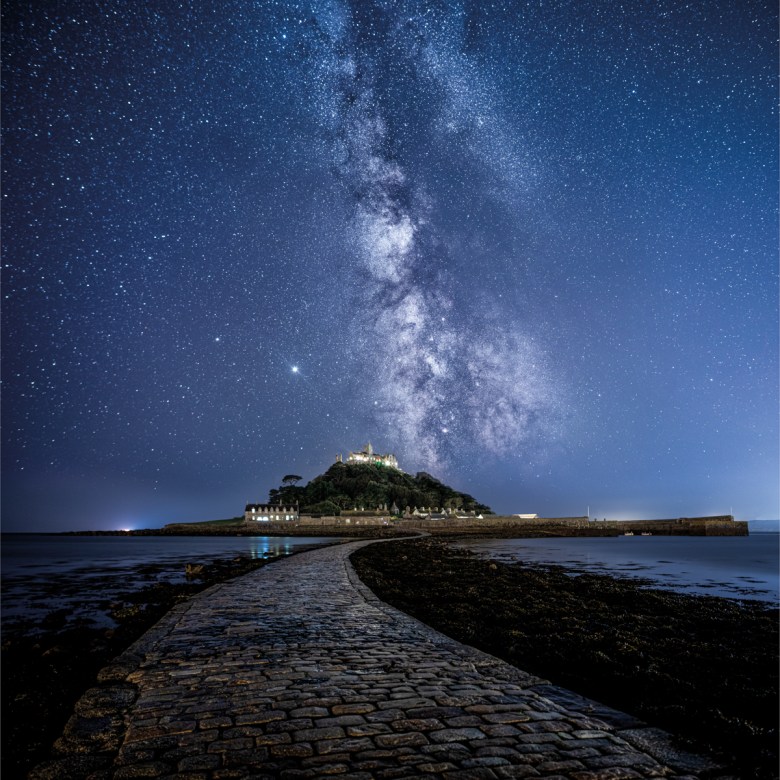
To see and photograph the Milky Way all you need is a dark sky location away from towns. The coast path is ideal, as it is possible to face over the sea, away from lights on the land and have dramatic compositions of the stars over the cliffs and the sea. The Milky Way can be photographed throughout the year. The brightest part of our galaxy is known as the galactic core. As Earth is on a spiral arm of the Milky Way galaxy and is orbiting around the sun we can see different parts of the Milky Way at different times of the year. The galactic core is visible from March until October in the south of the UK. During the winter it is possible to photograph what we term ‘the winter Milky Way arch’ stretching from Sirius in the S to Cassiopeia in the N and constellations such as Orion. From March to October it is possible to photograph the galactic core and parts of the Milky Way including the great rift and Cygnus regions.

To learn about the sky, mobile phone apps such as ‘Stellarium’ and ‘Night Sky’ are useful as you can point your phone at the sky and it will tell you what you can see. If you want to photograph the Milky Way core it is worth learning where it appears in the sky at different times of the year, for example in March and April it is visible roughly between 3 and 5am in the SE, then in May and June between 1 and 3 in the S, in June there is very little astronomical darkness but we can still see the core in the south between midnight and 2am, as we move through the summer the core moves more to the SW and then the W and is visible earlier in the night. Apps like ‘Photopills’ and ‘PlanitPro’ give precise times and orientation and allow you to pre-visualise the Milky Way in the night sky. If you go out at night, always go to a spot you know well, that you have visited in the day time, and be aware of the tides.
To photograph the night sky you need a sturdy tripod and ideally an SLR or a good mobile phone camera. Here are my top tips for using a mirrorless camera or SLR:
- Always use a tripod
- Work your shot out in the day time, it is very difficult to pick a composition at night
- Set your ISO to 6400 or 12800
- Set your White balance manually if you can to 3000-4000k
- Put your camera in manual mode
- Earth is moving! To have sharp stars and avoid trailing, set a shutter speed of 10-14s (14s for 14mm but 10s or less for 24mm to avoid star trailing)
- Use a wide angle lens (10-24mm) and open the aperture as wide as possible (f2.8 or wider if possible)
- Use a shutter release or a shutter delay to avoid jogging your camera
If using a mobile phone:
- Mount it on a tripod
- Press the moon symbol for night time (on an iPhone)
- A range of shutter times should appear, push this along to 30s
- For any camera shoot in Raw if you can
As you get more experienced you can either stack photos to reduce digital noise using Sequator (PC) or Starry Landscape stacker (Mac). For the ultimate in night sky detail invest in a star tracker which rotates the opposite direction to the Earth and allows you to take long exposures of the night sky.
There are numerous great night sky locations on the coast path. Where you go depends on what you want to photograph. For example if you want to photograph the galactic core in the spring then a SE or S facing location is needed. If you want to photograph it in the summer then S to SW, and in the autumn SW to W. To photograph the Milky Way arch face East in the spring or or West in the winter, in the summer it is difficult to photograph as it is higher overhead. Dorset is good year round for photographing the core as the coastline faces south and you can find SE, S and SW facing locations easily.
Some of my favourite coast path spots are:
- Speke’s Mill Mount (SE over the waterfall in the spring, SW from the beach in the autumn)
- Land’s End, Pordennack Point (SE, spring)
- Gribbin Head, Fowey (SE, spring)
- Beer, East Devon, SE and S (spring), also Orion in the winter
- Kynance Cove (S and SW, May onwards)
- Summerleaze beach and sea pool – summer (S and SW)
- Duckpool (S and SW, June onwards)
- Sandymouth (S and SW, May onwards)
- St Michael’s Mount – different positions but from the causeway August and September
- Godrevy for winter Milky Way shots
- Hartland Point for winter Milky Way arch
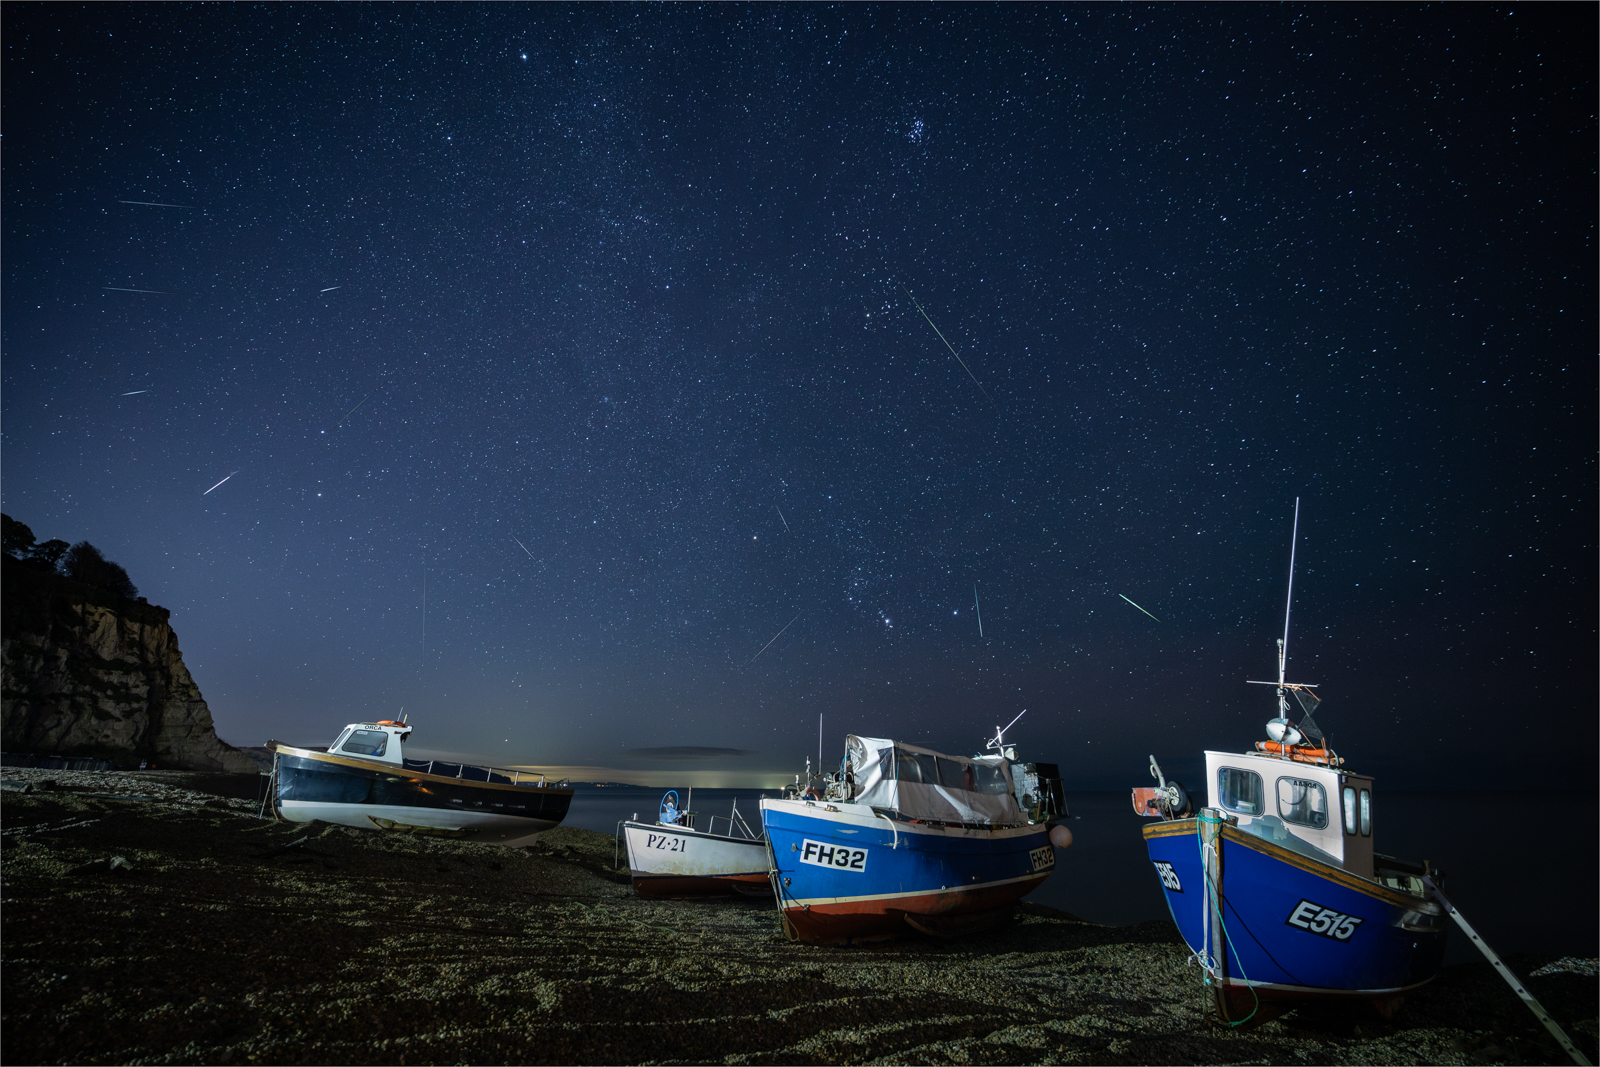
Other night sky phenomena to photograph include the Perseids meteor shower in August and the Geminids in December.
When you go out take a rug, a flask of hot drink and some binoculars if you have them for viewing the constellations. Enjoy the wash of the tide on the beach and the movement of the stars overhead. Take your time and immerse yourself in a peaceful wonderful experience.
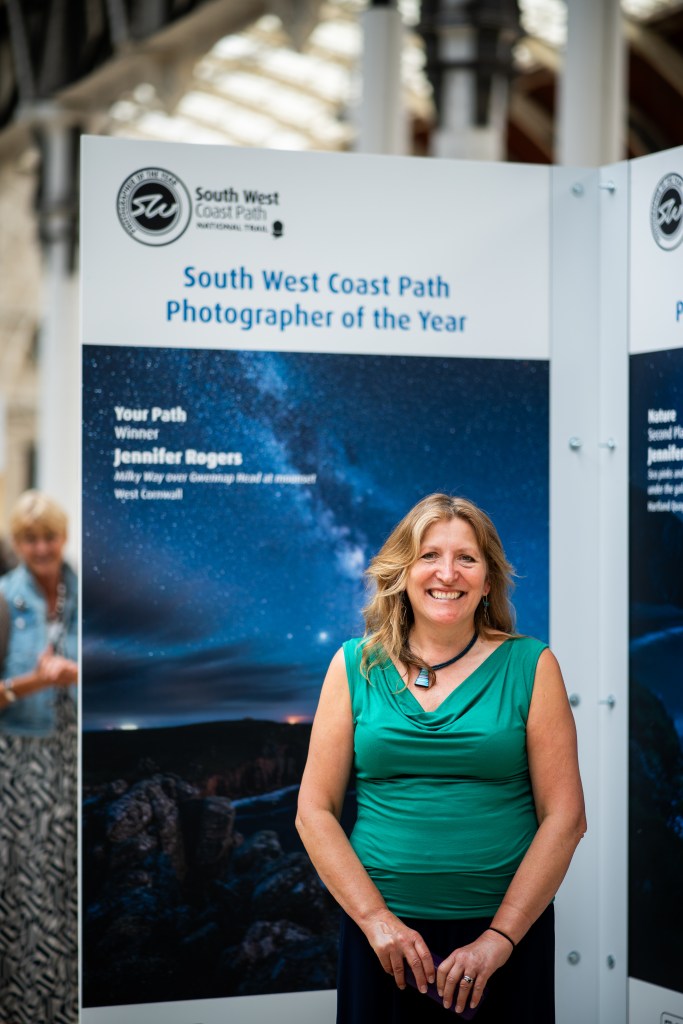
Jen Rogers is an astro and seascape photographer based in North Devon. She was shortlisted for Astrophotographer of the Year in 2020 and 2022, Runner up in Landscapes at Night and Commended in the Historic Britain categories of Landscape Photographer of the Year 2022, winner of the Your Path and Nature categories of the SWCP Photographer of the Year competition in 2024 and Runner up, Travel category, London Camera Exchange Photographer of the Year. Jen has been published in Outdoor Photography, Canon Photoplus magazine, Digital SLR Photography magazine and been selected for print of the month by She Clicks and Women in Seascape Photography. Visit Jen’s website www.jenrogersphotography.co.uk and follow her Instagram @jenrogersphotography.
Photographing the Northern Lights – Gary Holpin
Despite being a photographer for some time, I only recently turned my attention to capturing the magic of the aurora borealis, or Northern Lights. Seeing them in the South West of the UK isn’t common, and when they do appear, it’s often late at night with little advance notice. So, I decided to set myself a challenge!
Initially, researching how to predict the aurora felt overwhelming. Talk of solar winds and KP indexes left me completely baffled. At first, I only realised an aurora display had happened when I saw photos online the next day. Eventually, I found people on social media who understood the data and shared alerts when an aurora was likely.
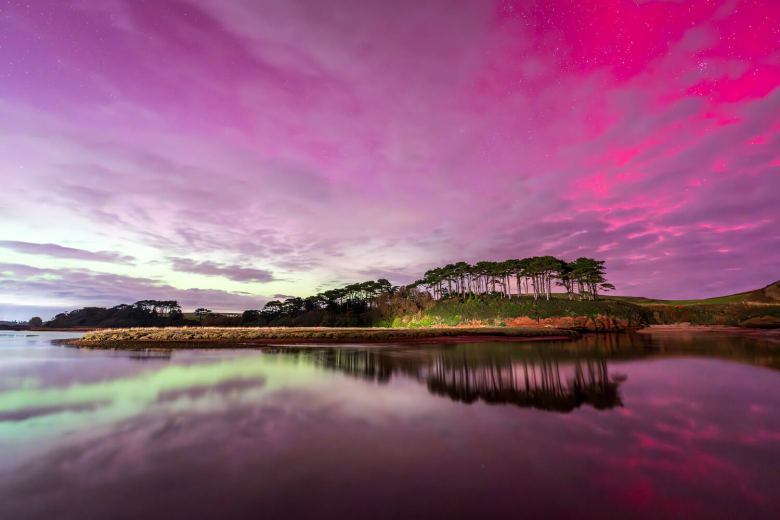
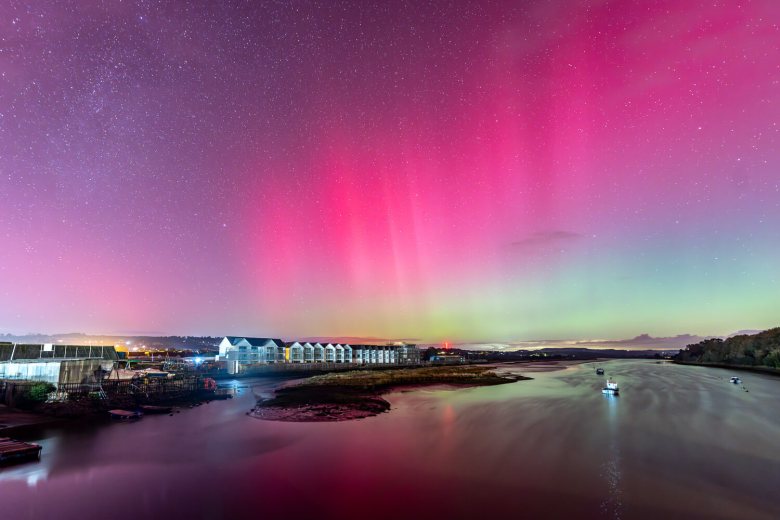
With the right information, I captured two spectacular aurora displays in 2024: one on Dartmoor in May, and another in October on the Coast Path at Seaton and Budleigh Salterton (both have surprisingly dark skies away from the towns). I spent hours in the dark, photographing two of my favourite things, the aurora and the Coast Path! In the UK, the aurora isn’t usually visible to the naked eye; you typically need a camera to see it. However, the October display was so strong that greens and purples flickered across the sky, which was an incredible sight!
Camera Gear and Settings
If you’re keen to photograph the aurora, you don’t need the most expensive kit, but a bit of preparation goes a long way. A camera with manual controls is ideal, but modern smartphones with a good night mode can also produce impressive results. A sturdy tripod is essential for keeping your images sharp during long exposures.
If you’re using a camera with interchangeable lenses, a wide-angle lens with a wide aperture (f/2.8–f/4) will let in more light and capture more of the sky. Start with your lens wide open (e.g. f2.8), an ISO of 1600–3200, and a shutter speed between 5 and 10 seconds. The aurora can be surprisingly bright, so it’s worth experimenting—if the display is strong, you might need a shorter exposure. If your camera allows, shoot in RAW format for more flexibility when editing. Also learn how to focus manually, using a star as a reference point, as your autofocus system may struggle in low light.
Composition Tips
A strong composition can make your aurora photos stand out. Try to include something interesting in the foreground—trees, rocks, water, or even a person for scale. Reflections in water or wet sand can add a creative touch. Using the rule of thirds helps balance the proportions of sky and foreground, making for a more pleasing image. If you can, scout your location in daylight so you know where to set up when it’s dark. Not only does this help with composition, but it also makes the whole experience a bit less daunting.
Top Tips for Photographing the Aurora
- Follow Wil Photography on Facebook and sign up for his alerts, so you know when a display is happening.
- Use a night mode on your mobile phone with a tripod, or a shutter speed of 5-10 seconds on a digital camera.
- Find dark locations nearby with a clear view towards the north. Much of the Coast Path (especially the north coast) is perfect.
- Be ready to go when you get an alert and be prepared to sit in the dark for long periods. Take a torch and wear warm clothes. I promise, seeing the aurora makes it all worthwhile!
By considering your camera gear and paying attention to composition, you’ll be in a great position to capture your own aurora moments—whether it’s a faint green glow or a sky filled with dancing lights.

Gary Holpin is a professional photographer based in Devon. Inspired by the South West Coast Path, Gary discovered his passion and talent for photography while walking its scenic trails. He shares his love for the South West through his landscape and seascape photography, and now earns a living teaching others how to capture the beauty of the South West coastline. For more of Gary’s work see www.garyholpin.co.uk.
